You’ve probably seen catalogs that
have inkjet decal paper advertised and thought “I wonder how difficult making my
own decals would be?” Well it’s really not that difficult, but up until now
it’s kind of been a ‘black-art’ meaning there hasn’t been too much press on the
subject. I want to tell you about my experiences with creating my own decals,
now I’m certainly no authority on making decals but I have learned a few things
along the way that hopefully will help people produce good results.
First I think a brief explanation of
how mass produced decals are made might be helpful in understanding the
limitations that come with making your own decals. Several companies make
‘water-slide’ decals; they typically are pad printed onto clear decal paper
stock. The inks used come in many colors including white and metallic colors
such as silver and gold. Because the inks are water based they need a sealant
to protect them. This typically is clear polyurethane which is applied over the
ink. They apply the sealant using a screen pad which only applies sealant to an
area slightly larger than the design, this saves money.
Unfortunately, making your own decals
using an inkjet printer has some limitations which you should be aware of.
First, the majority of inkjet printers will not print the color white. Those
that do are very expensive; printers use the white background of the
paper as white color in the design. Second, all but the most expensive printers
will not print metallic colors such as gold or silver.
I’ll discuss some other limitations
concerning sealing the decals later, right now let me show you how I got
started.
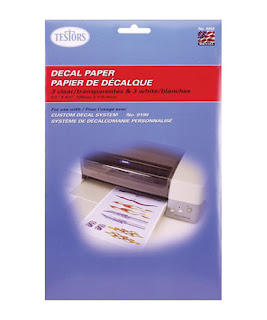
I purchased the
Testors Custom Decal System (704-9198) and an extra package of white decal
paper (704-9202). Read the instructions and install the software and your
almost on your way.
I’d like to tell you
a few more things to keep in mind before you print your first decal sheet. It’s
important to maximize the design space on each sheet, using 1 sheet to make a
small design isn’t a good use of your materials.
When you become prolific at making
decals, (and you will!) you’ll soon find yourself running out of supplies like
decal bonder spray and decal paper. I have never tried any other brand of decal
paper than Testors, so if anyone has, please feel free to comment.
There has been some talk on various forums
about using a gloss finish spray such as Testors or Floquil as a decal bonder,
all I can say about this is that I have tried them and they do not work. The spray left the surface of the decals
sticky even after soaking them in water. And when attempting to slide the
decals on to the surface they stuck to anything that touched the face of the
decal, (fingers, paint brush, etc) usually tearing and ruining the decal. My
advice is not to use anything but the following as a decal bonder.
Using the decal bonder that comes
with the kit works fine however, I’ve also used the following.
The one on the bottom is Last Step
Decal Bonding Spray made by Super Cal unfortunately; this company no longer
makes it, so if you find a clear Polyurethane spray (like the one on top)
it will work. The obvious advantage in
using the large can is cost.
After printing the decal sheet I tape
the corners of the sheet down to a cardboard box using clear magic tape, (be
careful not to cover any designs). The box keeps me from handling the sheet
after spraying on the bonder. Apply the bonder spray using a couple of light
coats, (usually up/down and side to side) then set aside to dry for about an
hour. After drying I usually repeat the above steps and wait for them to dry
again. Then you can remove the sheet from the box and use the decals.
Sometimes I find that I don’t have
enough designs to fill up an entire sheet or perhaps I’ve got some designs for
clear paper and some for white paper.
Being a somewhat impatient person I don’t want to wait until I have
enough designs to fill an entire sheet so I’ll let you in on a trick that works
for me. I go ahead and print out the partial sheet of designs, I make sure what
designs I do have are clustered at the top of the sheet, (remember about
maximizing the design space on the sheet?). Once I have printed the designs I trim
off the designs square to the rest of the sheet, (I
haven’t sprayed them with
the bonder at this point)
Now I put the partial sheets of decal
paper with no designs someplace safe, (like back in the package or in a zip
lock bag). It’s important that you don’t spray the decal bonder on the unused
sheets or you won’t be able to reuse them.
The partial sheets with
designs can now be sprayed with bonder and used like normal.
Now let’s say that later I’ve got a
partial sheet of designs I want to print again, well rather than using a full
sheet I use the ruler on the design screen to determine if I have a partial
sheet large enough to print them on. Sending a partial sheet through the
printer by itself won’t work. You’ll need to print a calibration sheet.

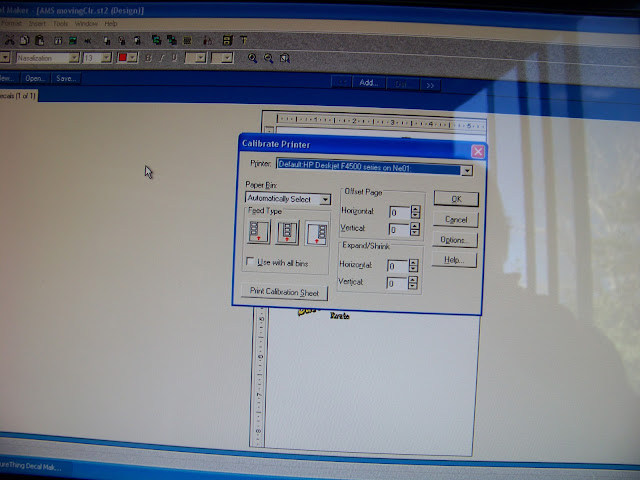
From the decal maker software, under
the File menu is the ‘Calibrate Printer’ selection. Select the paper bin
setting you wish to use and then click ‘Print Calibration Page’, (button on
lower left). This will print a page which shows you how the decal sheet is
oriented with respect to an 8 ½” x 11” sheet of paper. Ignore the text
information printed on the Calibration sheet; we’re only interested in the area
inside the lines. Now with this Calibration sheet you can tape your partial
decal sheet to the Calibration sheet being careful to align it inside the lines
on the sheet approximately where the designs will print, (remember not to cover
any designs with tape). Now you can send the combined sheets through the
printer. Separate the sheets, remove the tape, apply bonder and you’re good to
go!


